The dollhouse instructions start by assembling the structure, not the accessories or furniture, so I will follow that order. Keep in mind that the instructions are in broken English but the illustrations are detailed enough for you to follow along without the need for much reading.
The interior photos at the back of the booklet should help you identify many of the parts and aid in assembly as parts are not labeled according to what they are. The first step is to prepare the left side wall.
The dollhouse walls and floors were not warped, which is great because it will make gluing them together easier. It seems that no parts in this kit require painting. The exterior side of the walls are already pre-finished.
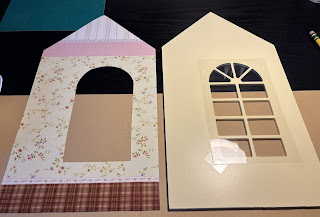
Unlike traditional wooden dollhouses, this one requires you to wallpaper each part before assembly as doing so afterwards is impossible. Each wallpaper piece is cut to the exact size of the wall it covers. Cut all wall and flooring paper very carefully as there are no extras.
The kit uses shiny paper that creases and tears easily, requiring touch-up paint. Be very careful with the paper to avoid damage as color matching paint for touch-ups can be very difficult.
Some of the wallpaper has dotted lines as a guide for you to cut out windows, before application, but others do not so you must trace the window on the back side for cutting out. Keep this in mind because every window is covered with acetate before wallpapering and so this will not allow you to cut out windows after the wallpaper is applied like you would in a traditional dollhouse.
I made some optional changes to the wall's wallpaper that differ from the instructions. First, I used clear tape instead of glue to apply the window acetate because the wallpaper is placed over it and will hold it in place. Then, I cut the wallpaper around the entire window instead of each pane, as the instructions suggest. The window mullions are already painted, so covering them with wallpaper seemed unnecessary. I prefer this outcome.


